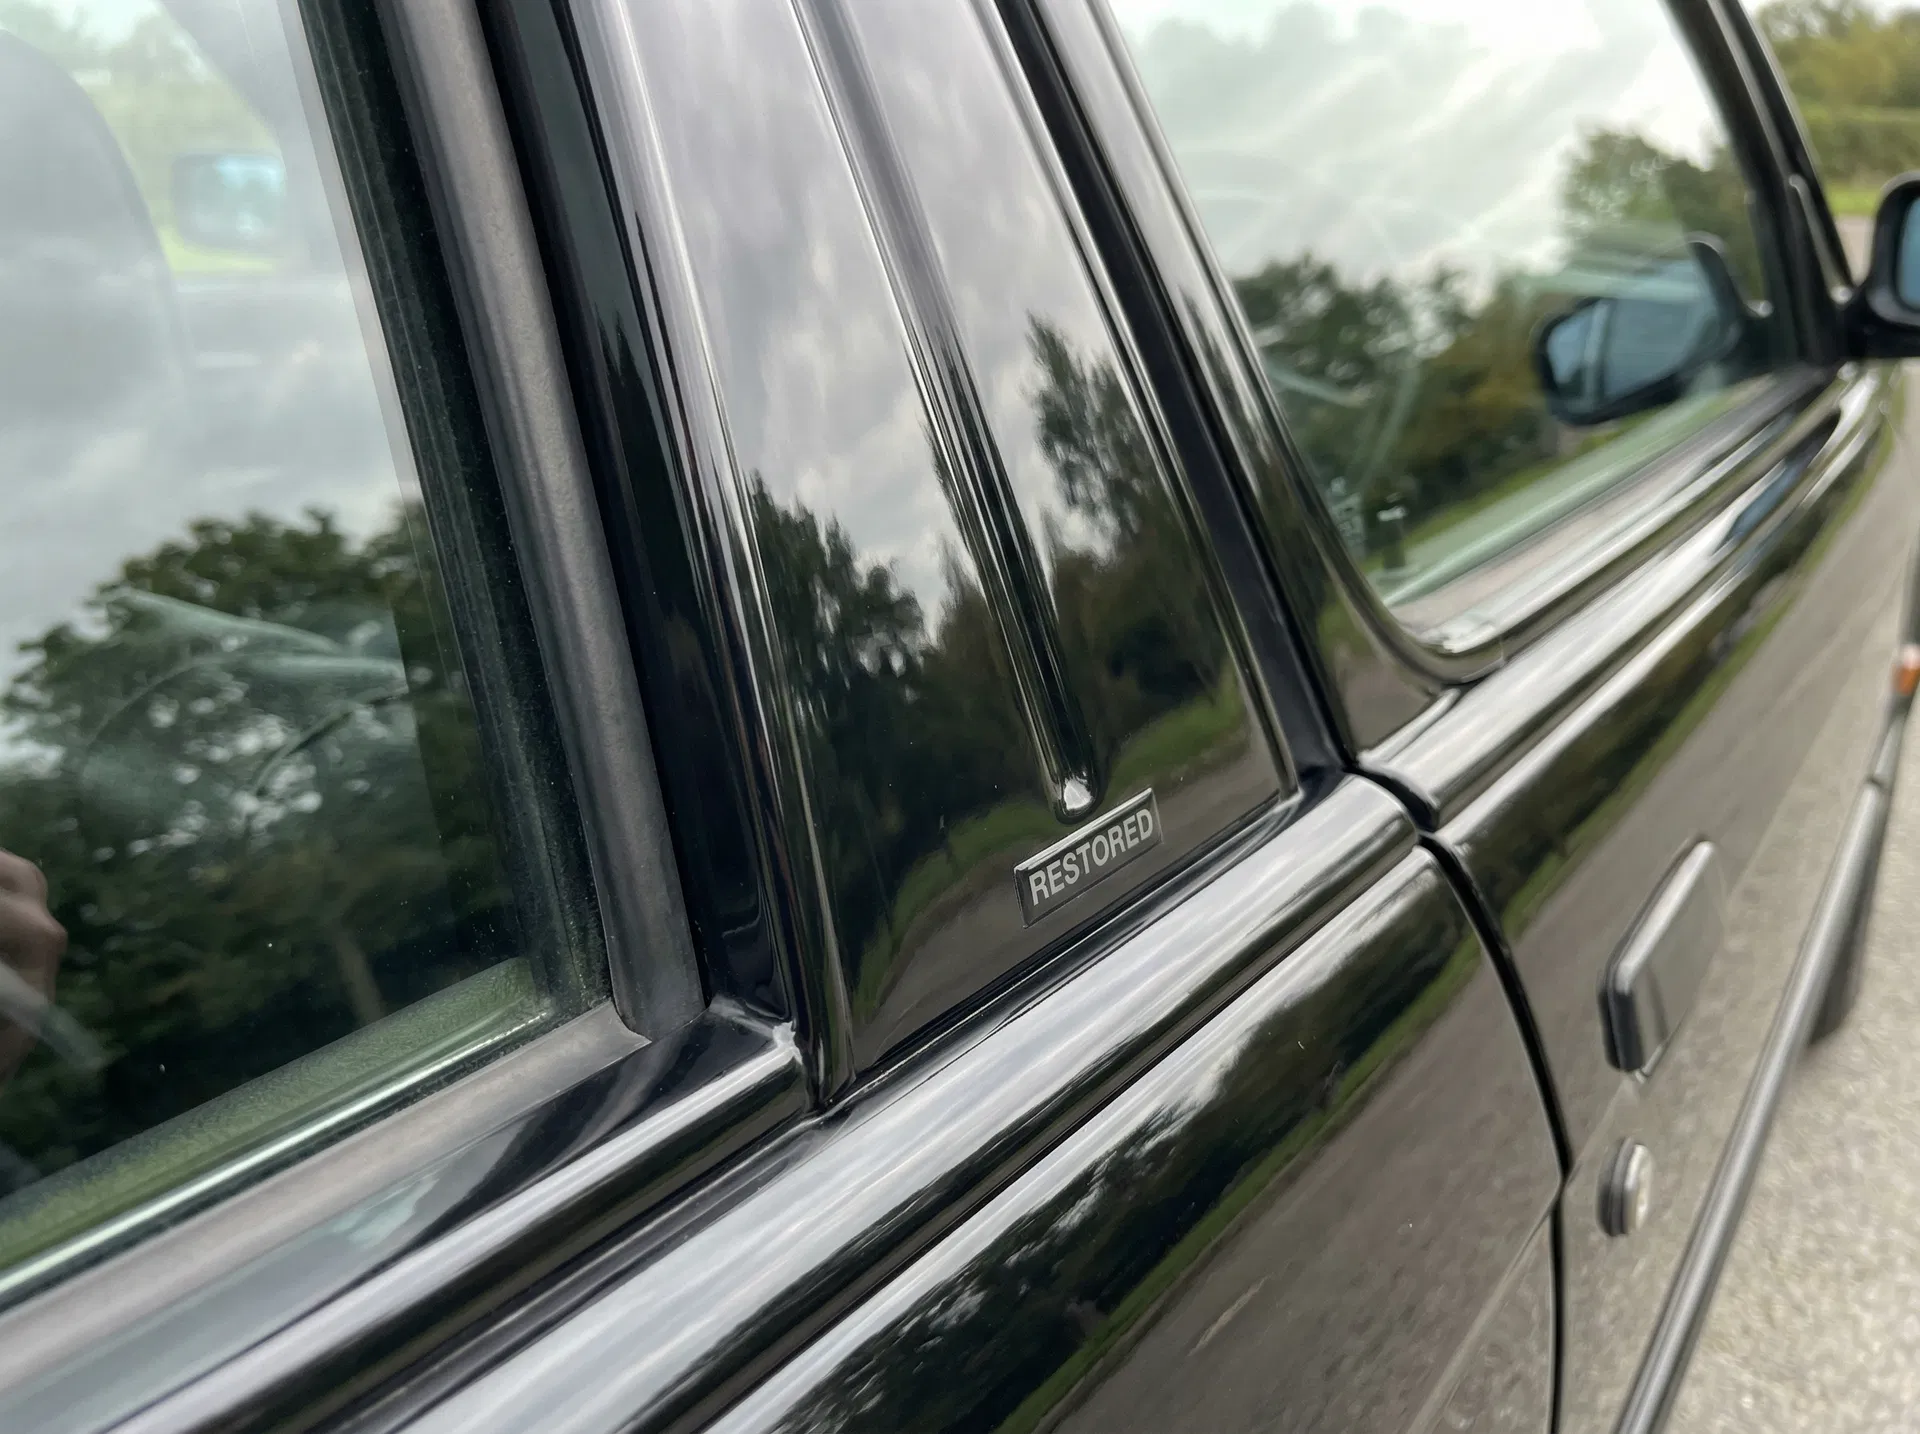
RESTORE YOUR TRIM TODAY
One-time access. No subscription.
YOUR FADED TRIM
DOESN'T HAVE TO
STAY THAT WAY.
A $4 can of oven cleaner can permanently restore chalky, oxidized plastic trim to deep, rich black — but only if you follow the exact method. Do it wrong and you'll damage your bumper. Do it right and it looks brand new.
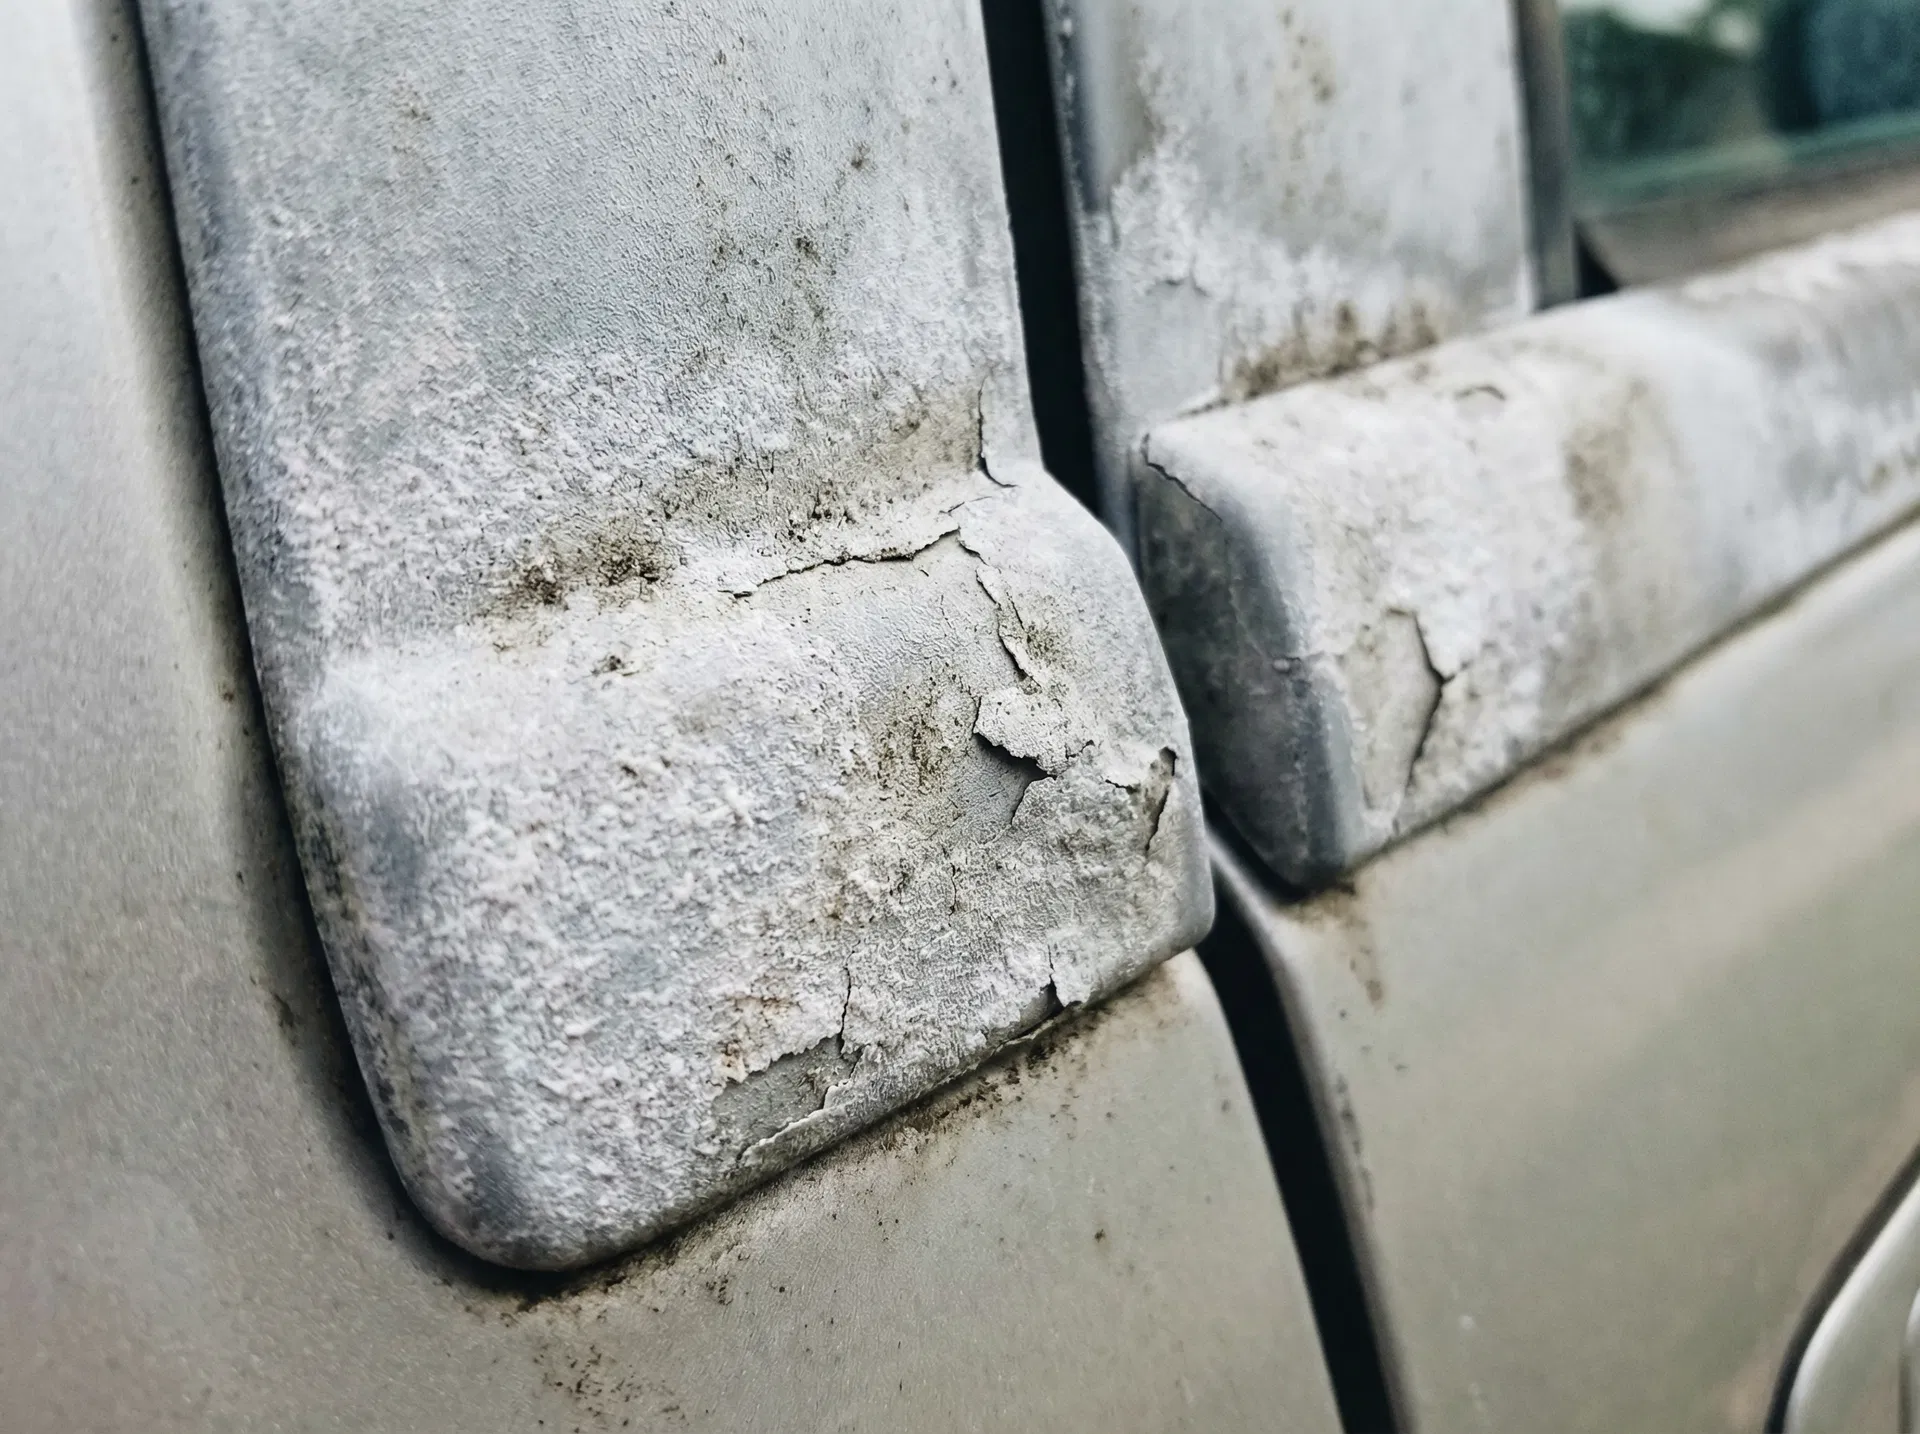
EVERY "FIX" YOU'VE TRIED ONLY LASTS WEEKS
You've probably tried trim restorer products from the auto parts store. They work for a few weeks, then the plastic fades right back. That's because those products sit on top of the surface — they don't actually remove the oxidation. You end up spending $15–$30 every few months on a temporary fix that never solves the real problem.
$15–$30 every few months
Temporary coating. Fades back.
$40–$80 tool cost
Easy to warp or melt plastic.
$4 one-time
Permanent results — if done correctly.
PEOPLE WHO TRIED THIS WITHOUT THE GUIDE
The oven cleaner method works — but the details matter. These are real accounts from forums and communities where people tried it without knowing the critical steps.
"Tried the oven cleaner trick I saw on YouTube. Left it on for 20 minutes like the video said. Now my bumper trim has white streaks baked in and I can't get them out. Going to cost me $300 to replace. Don't do this without knowing what you're doing."
"Used Easy-Off on my black plastic rocker panels. Didn't rinse it off fast enough and it left a hazy film I can't remove. Tried everything. The plastic looks worse than when I started. Wish I had a proper guide."
"I've seen this recommended a dozen times but nobody ever says HOW to do it. I used the wrong type and it ate into the texture of the plastic. Now it looks smooth and shiny in patches — completely different from the rest of the trim."
"Second time trying this. First time it worked great. This time I must have done something different because the plastic turned a weird brownish color. No idea what I did wrong. The first time I just got lucky I guess."
Every single one of these failures came down to the same thing: not knowing the specific product, the exact timing, and the precise technique. This guide gives you all three.
EXACTLY WHAT YOU'LL LEARN
The Exact Product to Use
Not all oven cleaners are the same. Using the wrong formula is what causes damage. We tell you the specific product and why it works.
Surface Preparation
How to clean and prep the trim before application. Skipping this step is the #1 cause of uneven results.
Application Technique
The exact amount to apply, how to spread it, and what to avoid. This is where most people go wrong.
Critical Timing Window
How long to leave it on. Too short and it won't work. Too long and you risk damage. We give you the exact window.
Rinse & Neutralization
How to safely remove the product and neutralize the surface. This step protects your paint and surrounding panels.
Sealing for Longevity
The optional finishing step that locks in the results and extends how long the restoration lasts.
GOES HERE
Replace CREATOR_PHOTO in code
A Real Person
AGE 65 · DIY MECHANIC · HUSBAND
I'M 65 YEARS OLD AND THIS IS HOW I KEEP THE LIGHTS ON.
I'm not a corporation. I'm not a marketing company. I'm a 65-year-old man who, like millions of Americans, made it to retirement age without a retirement fund. I worked hard my whole life, and somehow the finish line moved every time I got close.
My wife and I are doing what we have to do to keep the lights on. That means finding ways to earn honest money from the things I know. And one of the things I know is how to restore faded plastic trim on a vehicle without damaging it — because I figured it out the hard way, through trial and error, after reading dozens of forum posts from people who got it wrong.
I took before and after photos. I documented every step. And I put it all into a $5 guide because I believe in charging a fair price for real value — not gouging people. If this helps you fix your vehicle and it helps me and my wife cover a bill this month, that's a good trade for everybody.
"$5 from you means more to me than you know. And what you get in return is worth far more than $5."
I appreciate every single person who purchases this guide. You're not just buying information — you're helping a real family stay afloat. Thank you.
GET THE GUIDE AND HELP KEEP THE LIGHTS ON — $5STOP WASTING MONEY
ON PRODUCTS THAT DON'T WORK
A single can of trim restorer costs $15–$30 and lasts a few weeks. This guide costs $5 and gives you a permanent fix. The math is simple.
ONE-TIME PAYMENT — INSTANT GATED ACCESS — NO SUBSCRIPTION
YES — RESTORE MY TRIM NOW100% Satisfaction Guarantee. If you follow the method exactly and don't see results, contact us and we'll make it right. We stand behind this completely.